Pages

Showing posts with label Dinner. Show all posts

Saturday, January 14, 2012

Garlic Chicken with Israeli CousCous "Casserole"


Hello All....I've been tardy in posting this because I'm trying to figure out how to add a tab at the end of my posts with the "printer friendly" version of my recipes but it is not as easy as I anticipated.  There are a few different ways of doing it so I'm in "research" mode....So, again, apologies!!


My mom made this recipe and I had some warmed up as leftovers and fell in love. It is very tasty and it's a CASSEROLE! I never like casseroles, so when I do stumble upon a good one, it tends to be a keeper.  This is going to seem like a lengthy meal and does have a few steps.  My suggestion is start it a day or two in advance or early in the day.  The chicken benefits from longer marinating time and you won't feel so bogged down by multiple steps.

A couple of notes before you start....be sure to have a LARGE saute pan to brown chicken or do it in batches.  My couscous is a lil' darker in color then it should be and this is because my chicken started to burn before it was sufficiently brown, therefore making my pan sauce darker. This will also allow your chicken to cook a bit longer in your pan and the cook time will not have to vary.

I did not take a million photo's with this dish...more because I was rushing through some of it and then I lost light....so maybe at a later date when I make again, i will update post with more photos....

Garlic Chicken with Israeli CousCous Casserole
Adapted from Anne Burrell on Food Network.

Chicken:

2 whole garlic bulbs
1 lemon, zested and juiced
1 large bunch thyme, leaves only
1 tablespoon cumin
Pinch crushed red pepper flakes
Kosher salt
Extra-virgin olive oil
1 (4 to 5-pound) chicken, cut into 8 to 10 parts

CousCous:

Kosher salt
2 cups medium-size Israeli couscous
Extra-virgin olive oil
1 large onion, sliced
3 ribs celery, sliced thin
Pinch crushed red pepper flakes
1 1/2 cups dry white wine
3 tablespoons tomato paste
Large pinch saffron
2 zucchini, cut into 1/2-inch dice
2 to 3 cups chicken stock
1/2 cup pine nuts, toasted
3 scallions, white and green, sliced thinly on the bias

Directions

Chicken:
Preheat the oven to 375 degrees F. Wrap Garlic in tin foil and  roast them until they are soft when squeezed, about 30 minutes. Remove them from the oven and let cool.

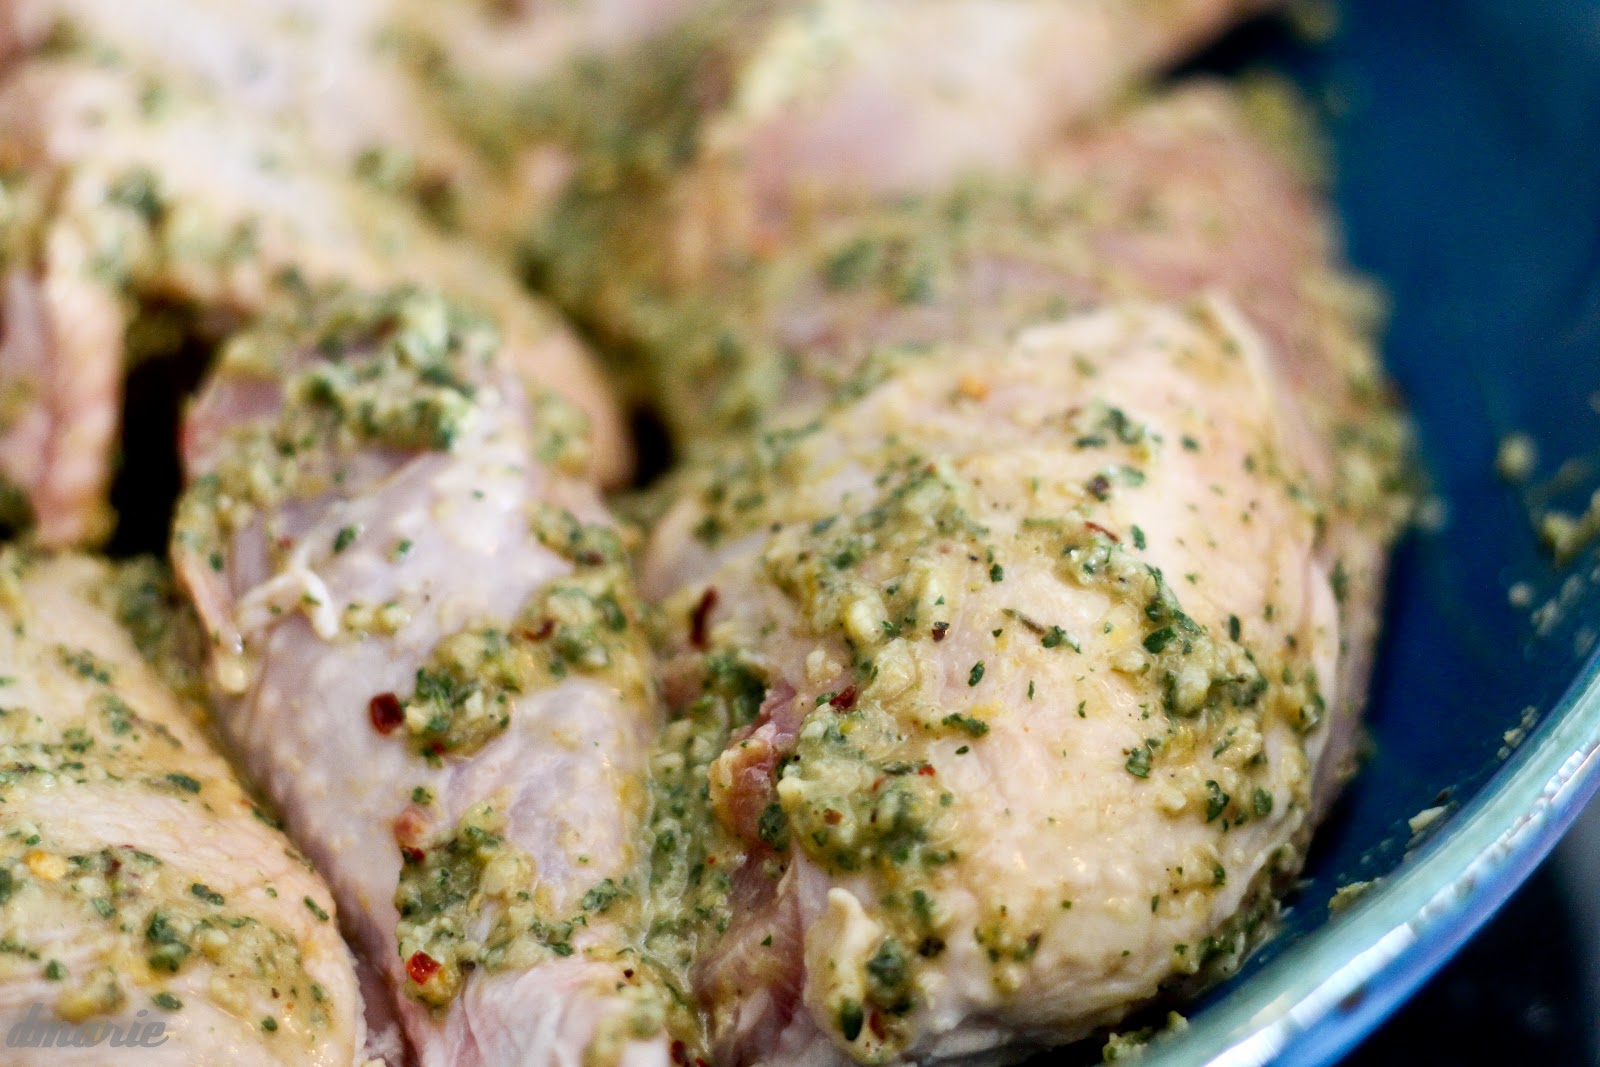
When the garlic bulbs are cool, slice the tops off and squeeze out the roasted garlic. Add the garlic to a food processor or a bowl, along with the lemon zest, lemon juice, thyme, cumin, crushed red pepper and salt, to taste. Add a little olive oil and puree or mash into a loose paste. Massage the mixture all over the chicken pieces and let sit for at least 1 hour.

Couscous:
Bring a pot of well salted water to a boil, over medium heat. Add the couscous and cook it until it's about 2/3 of the way cooked, about 5 to 6 minutes. Drain and reserve.
Trader Joe's "mixed couscous"
 
Coat a large saute pan with olive oil over medium-high heat. Add the chicken to the pan and brown it on all sides. Remove it to a plate, drain the fat and add the onions and celery. Season with salt, to taste, and the crushed red pepper. Deglaze with white wine, scraping up all the crud on the bottom of the pan and cook the onions and celery for 7 to 8 minutes. Stir in the tomato paste and cook for another 2 minutes. Add in the saffron, zucchini, cooked couscous, and chicken stock. Stir to combine, then taste and adjust seasoning, if needed. Transfer the mix to an ovenproof dish. Nestle the chicken, skin side up, in the couscous and cover with foil. Add some more chicken stock to keep everything nice and moist. Sprinkle with pine nuts and cover with foil. Place the baking dish on a sheet pan.
Roast the chicken for 20 minutes, covered, then remove the foil and roast for another 10 to 15 minutes.(My chicken required longer cooking because of my "browning situation")
Remove the chicken from the oven CHECK TEMP OF CHICKEN and top with scallions before serving.

Enjoy!


Saturday, November 12, 2011

Addicted to Pot Roast Taco's.....


Apologies for the "yellowish" pictures.  We were cooking at night with zero natural light.

My friend Deanna and I love to cook together.  She is addicted to yummy foodilicious recipes like me.  We are especially fond of the recipes most people shy away from due to a million steps or ingredients.  This recipe is NOT one of those.  This is closer to a "throw it in a pot and ignore it for a couple hours" sort of recipe and let me tell you....You will not be cooking again for a couple days because the left overs are better and better the longer they sit in the fridge (if you don't eat it all in one sitting!)

The recipe is an adaptation of Tyler Florence's Mexican Pot Roast Taco's or his Rock-n-Roll Taco's...pending on where you are looking.  The one thing we did notice is all of the recipes (based on where you are looking) are slightly different.  They all have one thing "wrong."  He never mentions reducing the sauciness after simmering...If you did not do this, you would be serving soup.  So, our adaptation begins....

Pot Roast Taco's
Adapted from Tyler Florence's Mexican Pot Roast Taco's because everywhere you look there is different ingredient measurements.

2 pounds beef shoulder or chuck roast (we used Chuck roast because it was all they had)
Salt/Pepper
Evoo
2 garlic cloves, smashed
1 large onion, sliced (not too thin)
1 (28-ounce) can whole tomatoes- we used diced tomatoes (recommended: San Marzano)
1 tablespoon ancho chile powder
1 T cayenne (we used 1 teaspoon of red pepper flakes but it definitely needed more)
1 T ground cumin
1 bunch of cilantro, divided in half.
water
2 T red wine vinegar

Salt and Pepper both sides of your roast/shoulder.  Heat 2-3 T of EVOO in the bottom of a heavy pot or dutch oven until shimmering.  Add roast/shoulder browning all sides well.  Add onion and scoot meat around so that it picks up some of the color (aka caramelizes.)  Add garlic and do the same (be careful not to burn garlic- it will get very bitter in flavor.)

Add can of tomatoes (with all juice), cayenne, cumin and cilantro. Do your best to stir it up a bit.  Add water to the pot, just enough to cover the roast.  Bring to a boil.  Cover with lid and turn heat down to low (or whatever your stove needs to be on to maintain a simmer) and simmer for 2 - 2.5 hours until meat falls apart when poked with a fork.
Add enough water to just cover roast
Reduced for approx. 30-40 min
Once meat is at the falling apart stage. Remove cover, add 2 T of vinegar and turn heat up to a slight boil to reduce the sauce.  This will also allow time for the meat to flake apart so you do not need to remove it and pull apart separately.   This will take approx. 30 min- 45 min (time depends on a lot of factors, heaviness of pan, how much water originally put in, how close to 2 lbs your roast actually is, whether your cover fit properly or if some water was able to cook off during roasting, etc....) Once it looks thick and yummy enough to put into a taco shell...DO SO IMMEDIATELY!! hahaha this is SO good! Add your favorite taco toppings and Enjoy.


Tuesday, August 30, 2011

Savory Chicken Crescents...


I know, I know, the Volcano Cake's were supposed to be the first "blog back" however I'm feeling a lil' PLUMP from the honeymoon...SO, instead I'm skipping the deeeessertttt for now and going with something scrumptious.  This is a recipe my mother has made for a million years and it is from our family cookbook printed when I was young. So, enjoy...FYI---KIDS LOVE THIS SHIT!!! (Sorry for swearing, but it's true!!)


Chicken Crescents 
Original recipe from Kathy Conaway from the "Family Cookbook"
Makes 4 crescents or sammiches....

3 oz. Cream Cheese, softened
3 T. butter or margarine, softened
2 cups cooked chicken, cubed or "pulled"
1/4 t. salt
1/8 t. pepper
2 T. Milk
1-2 T. Chives or Green Onion, chopped*
1 T. Pimento, chopped (Optional, I did not have so I did not use)
8 oz. can of Pillsbury crescent rolls
3/4 cup seasoned croutons, crushed (or potato chips, which were awesome by the way...)

Preheat oven to 350 degrees.  In medium bowl blend cream cheese, chives and 2 T. of melted butter (pour the butter over the cream cheese, it will warm it up a bit and help it incorporate) until smooth.


Add the s/p, milk and chicken, mix well.  

Separate crescents into 4 rectangles, firmly press perforations to seal.  


Spoon approx. 1/5 cup of meat mixture onto the center of each rectangle.  

Pull the four corners of the dough to top center; twist slightly and smoodge the seams together (aka, press to seal.)  Brush the tops with remaining melted butter and sprinkle with croutons or if you live in my family, potato chips because my husband and son are crouton snackers...I go to make a salad, and poof, gone....
Thief!!

the chips were bomb though! Fabulous substitution.

Bake on ungreased cookie sheet for 20-25 minutes until golden brown. 

Makes 4 sammiches...

Friday, December 4, 2009

Cheater Lasagna


My mother has been making her own meat sauce from scratch since I was a child.  It was perfectly sweet, acidic, meaty and garlicky.  Every time I would sit down and eat elbow macaroni, I would wonder, "How much sauce does this woman have frozen?  How does she always have sauce that takes more than 2 hours to make on hand?"  Eventually, I actually paid attention and realized, "Cheater Sauce."  She would dress up store bought sauce with additional ingredients but she also had a secret.

I'm about to spill the beans.......

MIX PREGO AND RAGU TOGETHER!!!!!!!!!!!!!!!!!!!!!!!!

What? What? It's that simple?

These 2 sauces on there own are not so yummy.  One is too tomatoey, acidic and the other is too sweet. Once mixed together though....."OH, SWEET HARMONY"

Ok, I'm am being a little dramatic here.  They do need a lil' more dressing up than that but damn, you will be a happy camper knowing that there is no need for chopping, simmering, mixing, chopping, simmering...etc...


Lasagna is definitely one of those times, in which homemade sauce is NEVER needed (no matter how fancy.) This is my version of Cheater Lasagna.  Feel free to mess with your own ingredients and measurements.  Until today, I had never paid much attention to how much I used of anything so these are "guesstimates" at best.  Taste, taste, and taste some more...if it needs sugar, add sugar.  If it needs garlic, add garlic....You get my drift??!!

Cheater Lasagna

Meat:
1.5-2 lbs. ground beef
Evoo

Sauce:
1 Large (67oz) Prego
1 Large (67oz) Ragu
2 Carrots, left whole or cut into 2 large chunks

1 Celery stalk, left whole or cut into 2 large chunks

2 cloves garlic, minced
Evoo

Ricotta Mixture:
1 Ricotta cheese (15oz)
2 cloves garlic, minced
1 t dried parsley
1.5 t dried oregano
1 Egg


Lasagna Noodles
6 cups mozzarella cheese, shredded


Directions:
In a large skillet, heat 1 T evoo over Medium high heat until shimmering.  Add beef and brown.  Drain off the excess moisture.  Set aside.


In a large stockpot, heat 1 T evoo over medium heat and add minced garlic until fragrant, approx. 30 seconds.  Add both containers of sauce, prego and ragu.  Drop the carrot and celery in and allow to come to a simmer.  Reduce heat and simmer for as long as you want.  I usually go at least an hour.  Prior to mixing with meat be sure to remove carrots and celery stalk.  You can skip the carrot and celery step all together and simply add sugar.  Add a Tablespoon at a time until you reach your desired sweetness.


Empty container of Ricotta in a medium sized mixing bowl.  Add minced garlic, parsley and oregano.  Break Egg and mix thoroughly.  Place in refrigerator until ready to assemble lasagna.


**forgot the egg--sorry**


Pour half the sauce mixture into the meat. (I do this because the amount of beef I have usually varies and I like the correct sauce to beef ratio- You can always add additional sauce to the lasagna but it is more difficult to brown more meat because you made it too saucy- does that make sense??)


In large lasagna pan or a deep 13x9 pan or what ever pan you feel like using, add JUST sauce (no meat) to the bottum of the pan.  I feel when you add the meat as well it tends to stick.  Layer the noodles, then the Ricotta, then shredded mozzerella, then meat sauce, then noodle.  Repeat 2 or 3 more times pending on your pan. (I usually only get 2 more times)


**Repeat above steps 2 or 3 more times**

You will end with noodle on top.  Add just the sauce at this point and then top with mozzerella and I added basil.


Place pan on cookie sheet so you do not have any overflow (which I have everytime.)  Cover with foil initially to help the baking process along.  Bake at 350 for approx. 45 minutes or until bubbly and cheese is melted, removing foil approx. half way through cooking.   Be sure to stick knife through center to make sure all noodles are cooked through prior to turning off oven... Let sit for at least 15 minutes to allow it to set or you will have a sloppy watery mess on your hands....

 
**half way through, remove foil**


IMPORTANT NOTES: This will make more sauce than you will actually use in  most cases so just freeze or serve with some sauce on the side for those whom like it extra saucy!  Be sure to use enough sauce.  I always use more than I think I should when assembling and it turns out great.  The amount of cheese depends on you.  I suggest to go over board rather than under board.


Monday, November 23, 2009

Homemade Take-Out...Beef & Broccoli


This was my very first time ever attempting an Asian recipe.  There are a few reasons:

  1. I'm not a huge fan of Asian food (besides the horribly bad for you fried a hundred times kind.)
  2. The ingredients are never "cut and dry."
  3. I never really know what the heck the ingredients are or what they are supposed to do/taste like.

I found this recipe on thepioneerwoman.com website, which I love and you should check out.  She, in turn, got the recipe from "The Steamy Kitchen Cookbook" by Jaden Hair.  I have yet to purchase the cookbook because I wanted to try the recipe first but I did flip through it at Borders and I LOVE LOVE LOVE that she lists substitutes for the strange ingredients that typically you would have to go to 3 grocery stores to hunt for, just to find out you can only get it at a specialty Asian store.  I don't know about you, but those stores scare the sh*% out of me! They have some straaaannnnggge stuff in there, like dried shrimp in a bag that is hanging next to the licorice, intended to be popped in your mouth like a potato chip....Cacca!


Jaden’s Chinese Beef Broccoli 
(from The Steamy Kitchen Cookbook)

SERVES 4 AS PART OF MULTICOURSE MEAL

1 lb top sirloin or flank steak, thinly sliced into 1/8-in strips (I used sirloin)
11/2 lbs broccoli, cut into bite-size florets
1 T high-heat cooking oil (I used canola)
1 T minced garlic

Marinade:

1 1/2 t soy sauce
1 t cornstarch
1/2 t cooking oil (I used canola)
Freshly ground black pepper to season the beef

Stir-fry Sauce:

3 T oyster sauce
2 t Chinese rice wine (or dry sherry) (I used dry sherry)
2 t Chinese black vinegar (or balsamic vinegar)(I used Balsamic)

In a bowl, combine the ingredients for the marinade. Place meat in ziploc pour in marinade, massage, let sit 10 minutes.

Prep your meat,broccoli and garlic.


In another small bowl, mix together the stir fry sauce.


In a wok or large sauté pan, add 1 inch of water and bring to a boil. Add the broccoli and cover to steam for 3 minutes. The broccoli should be bright green, crisp tender and you should be able to pierce the stem with a fork. Drain. Dry the pan.
 
*sorry steam was causing issues with my auto focus*


Set the pan over high heat and when hot, add the high-heat cooking oil and swirl to coat. Add the garlic and fry for 15 to 30 seconds, until fragrant. Add the steak strips, keeping them in one layer and fry 30 seconds. Flip the strips and fry the other side. I, as did the pioneerwoman, had to do this in 2 batches because of the size of my pan.


Pour in the Stir-fry Sauce and stir to combine. Simmer until the sauce is thick enough to coat the back of a spoon, about 30 seconds.

 Add cooked broccoli back to pan and your ready to eat....